The Balanced Canvas: Styling Neutral Undertones
Here’s the art of it: your unique chemistry grants you complete spectrum flexibility.
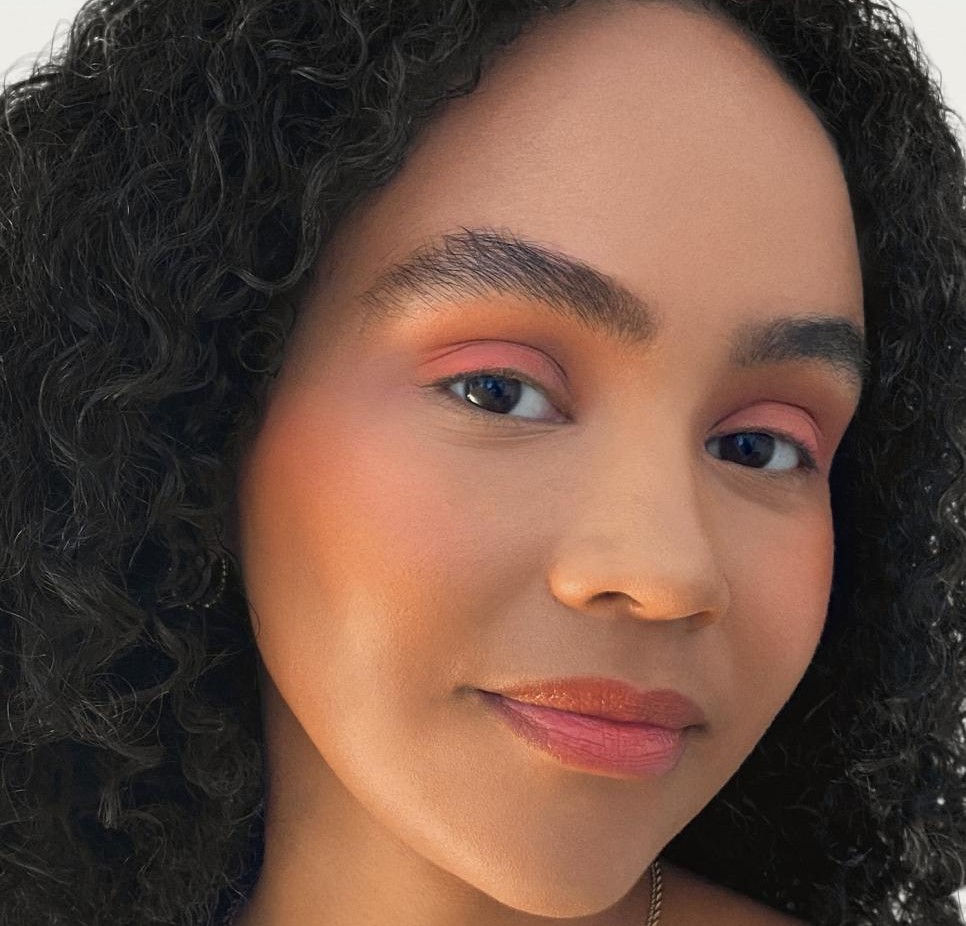
Curated Color Architecture
The Dual-Spectrum Advantage
Because your skin tone bridges both warm and cool families, you can seamlessly experiment across the entire spectrum to see what resonates most with your aesthetic.
Blush Palette
- Neutral Pink & Rose
- Dusty Rose
- Peach & Soft Coral
- Apricot & Warm Rose
- Terracotta
Eyeshadow Tones
- Taupe, Champagne, & Soft Brown
- Rose Gold & Bronze
- Mauve & Chocolate
- Gold, Copper, & Caramel
- Peach & Warm Plum
Lip Colors & Illumination
Pink nude, rose, neutral red, dusty rose, berry, beige nude, peachy nude, warm nude, coral, terracotta, brick red, orange-red, and warm brown.
Gold, champagne, warm pearl, icy champagne, and soft pink highlights all catch the light effortlessly.
How to Apply Makeup
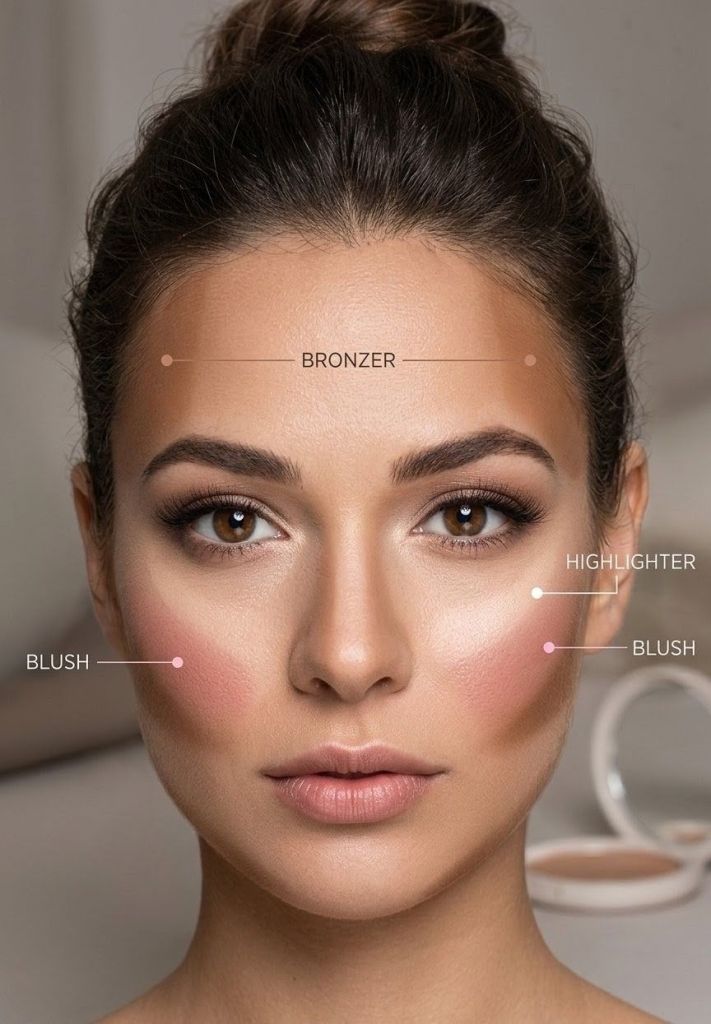
01 — Start With Clean Skin
Wash your face and apply your normal skincare. Give moisturizer a few minutes to settle before applying makeup.
02 — Apply Primer
Create a smooth surface tailored to your skin architecture:
- Dry skin: Hydrating primer
- Oily skin: Mattifying or oil-control primer
- Combination skin: Use different products on different areas if necessary, or find a product specifically formulated for combination skin. (What’s my skin type?)
03 — Apply Foundation
Start with a small amount. Apply foundation primarily where you need coverage and blend outward. Ensure a seamless transition along your jawline so your complexion meets your neck without an artificial barrier line.
04 — Concealer
Use concealer where additional coverage is needed. For under-eyes, restrain product volume; a featherlight application blended gently yields high-fashion realism.
05 — Bronzer
Introduce warmth and dimension to high points where natural sunlight strikes:
Temples
Cheek Area
Jawline
• Note: Never substitute bronzer for contour; their structural functions are distinct.
06 — Blush
This is where the undertone blueprint comes alive. Apply blush to the cheeks and blend upward toward the temples. Start lightly — you can always layer more if needed.
07 — Highlighter
Apply a small amount where light naturally catches:
08 — Eyes
A simple everyday eye look:
Blend eyeshadow smoothly so there aren’t obvious lines between the colors.
09 — Brows
Brush your brows upward and fill only where additional definition is needed using an eyebrow brush or spoolie.
10 — Lips
Apply lip liner first if desired, followed by your choice of lipstick or gloss.
11 — Setting
Finish with a setting spray to lock integrity, prevent midday smudges, and restore any subtle hydration compromised during the layering process.
Stíl Solas Masterclass Series

